Estimated reading time: 7 minutes
Learning how to make biochar is a no-brainer if you’re trying to improve your soil without spending any money.
We became big fans of biochar years ago when we learned about its amazing properties and uses. Then we hosted a workshop at our farm to learn how to make two backyard biochar systems out of 44-gallon drums.
Those techniques are useful, but building the vessels is a bit complicated. It seems like a lot of effort to produce a small amount of biochar.
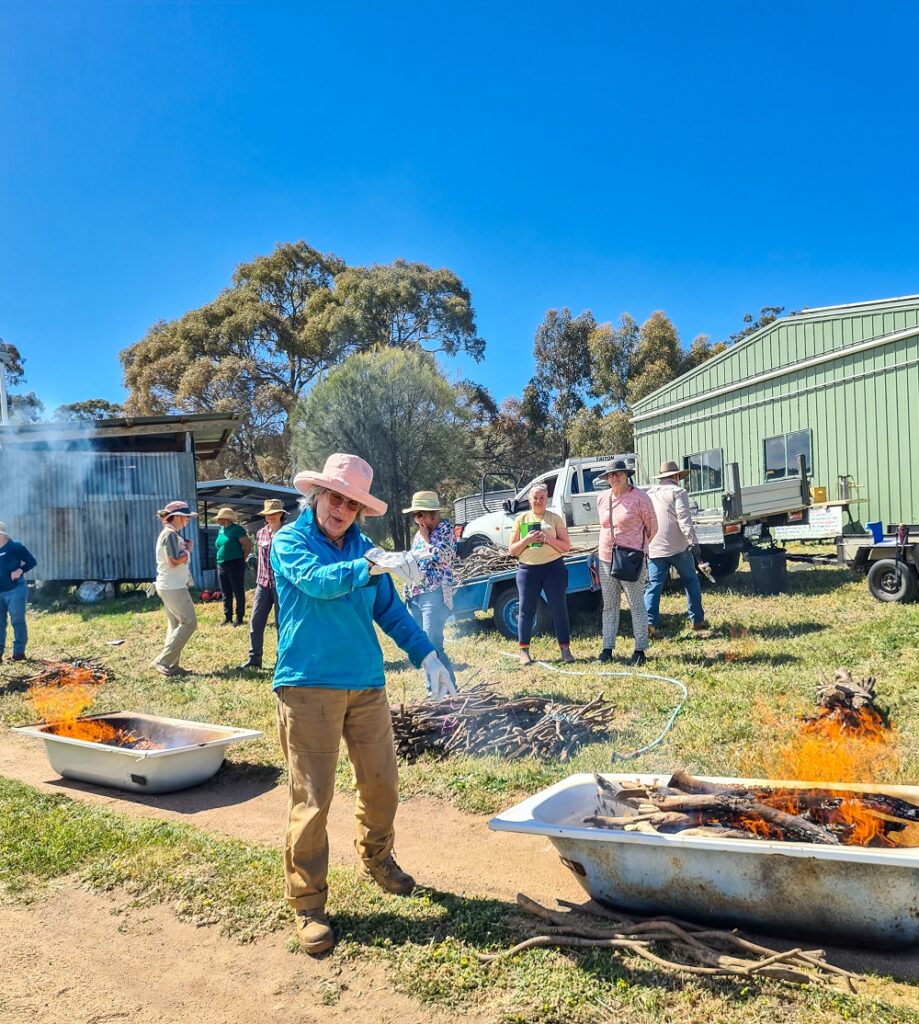
Discovering how to make biochar in a bathtub was a game-changer.
A simple method for making biochar
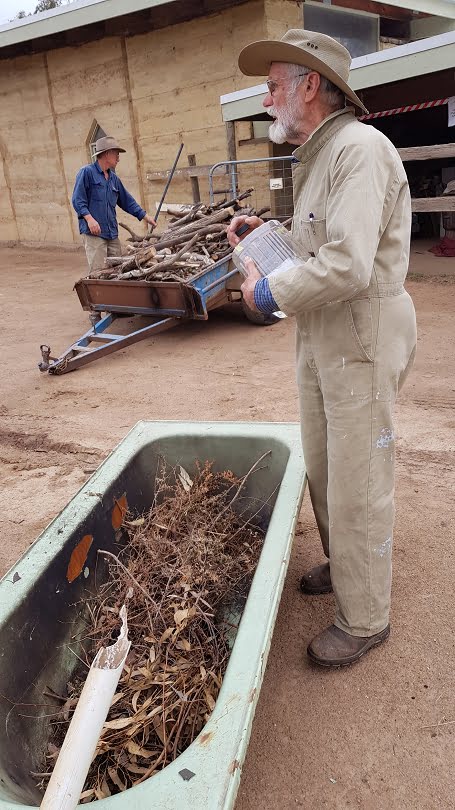
We were lucky enough to be invited to a small, privately run workshop that introduced us to a much simpler system for making biochar in a bathtub.
It was hosted for us by Grow Great Fruit members Win Westerhoff (below left) and Clare Claydon, and the workshop was presented by biochar enthusiast Jim Sansom (below right). We were so impressed that we asked Jim to present a workshop at our place.
Jim started by talking us through the main steps of the method.
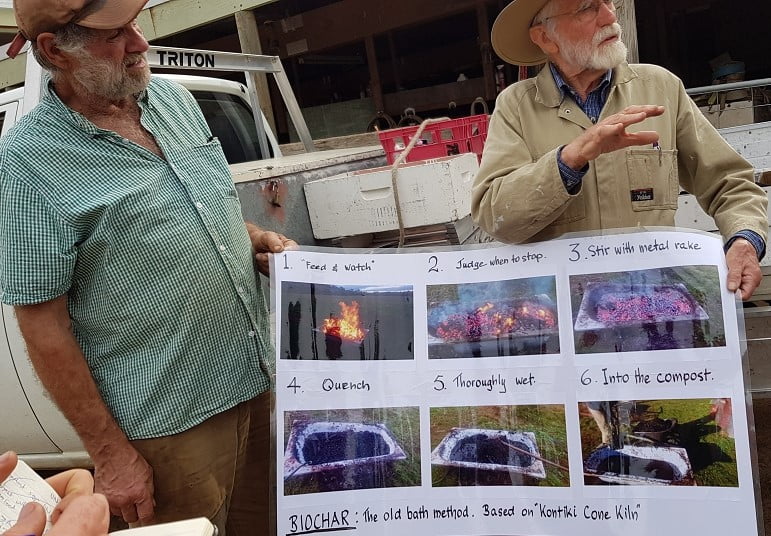
Making biochar in a simplified Kontiki Cone Kiln
The bathtub method is based on the ‘Kontiki Cone Kiln’ but is a much simplified version. The Kontiki Cone Kiln is a large (about 1.6 m across) kiln for making biochar.
One of the challenges with this method is that there are no hard and fast rules about when to stop the burn. “Judge when to stop” was Jim’s advice, “when a stick has lost its identity as a stick”.
Another thing to know before you start is not to use a cast-iron bathtub, or it may crack when you light a fire in it. And obviously, don’t use a modern plastic or fibreglass bath either. You need to find an old steel bath at your local tip shop.
Biochar making method
At the workshop, we went through the actual process of making biochar under the expert tutelage of Jim, Clare, and Win. It was surprisingly fast and easy.
Here’s how it works:
Step 1
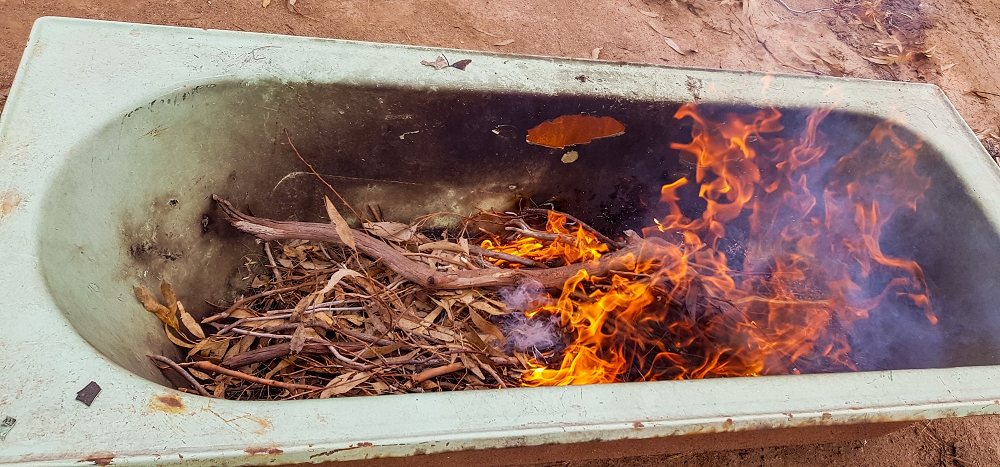
Fill the bottom of the bathtub with light, dry fuel.
Step 2
Light it on fire. (Pro tip: use a bit of metho if needed). Aim to get a good, strong fire going along the whole length of the bathtub.
Step 3
Once it’s burning, pile up with bigger stuff, but make sure it’s burning the whole length underneath. (Pro tip: this is much easier on a still day than a windy one.)
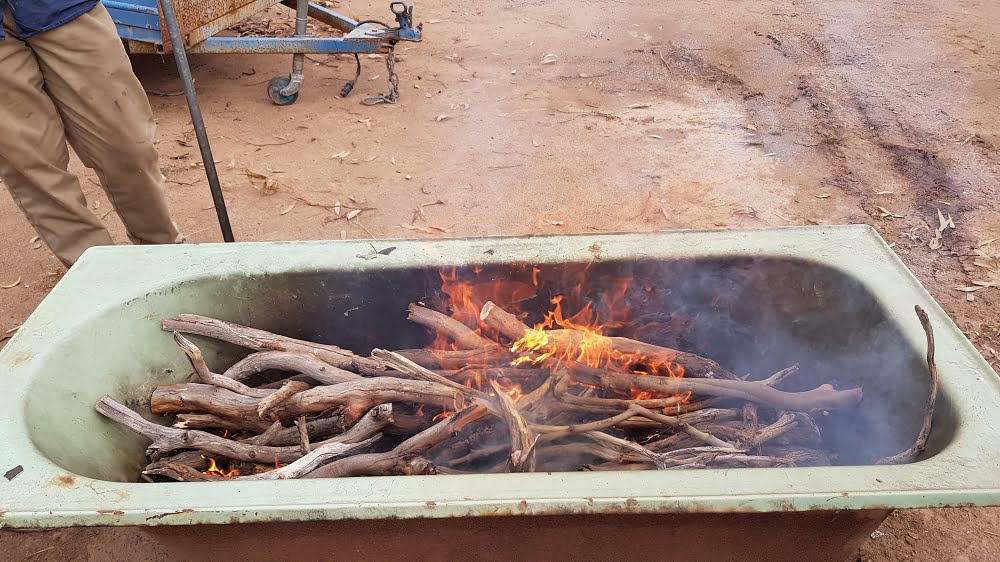
Step 4
Stack the bath until it’s 3/4 full. If the fire is burning well, it shouldn’t be too smoky. It’s fine to use bigger wood in the bathtub as long as it’s all roughly the same size, so it burns at about the same rate.

Step 5
Use a metal rake to pack the wood down hard. This also keeps the fire burning evenly and everything burning at the same rate.
The gases will be pushed out of the wood and then burned in the bathtub. This prevents oxygen from getting down into the fire. If too much oxygen gets into the fire, the wood will just burn away to ash.
New research has shown that if the biochar is made at a lower temperature, you end up with biochar that has a higher level of organic matter.
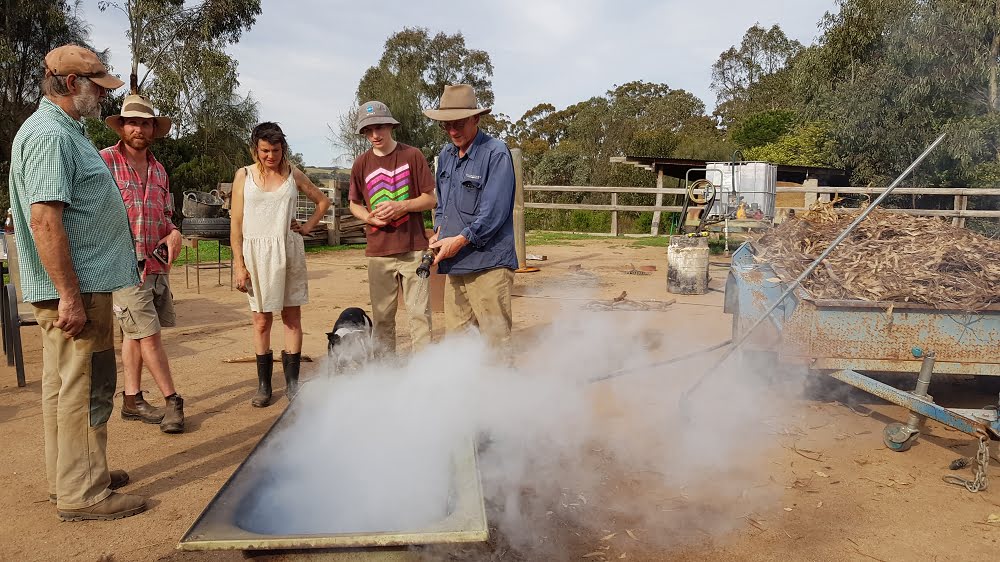
Step 6
When you judge that most of the material is blackened to char (and the sticks have lost their essential ‘stickness’), quench the whole thing with a hose.

It’s completely fine to have sand, dirt, clay, or mud on the wood and in the cooking process.
In fact, this may be beneficial by creating a more highly mineralised final product.
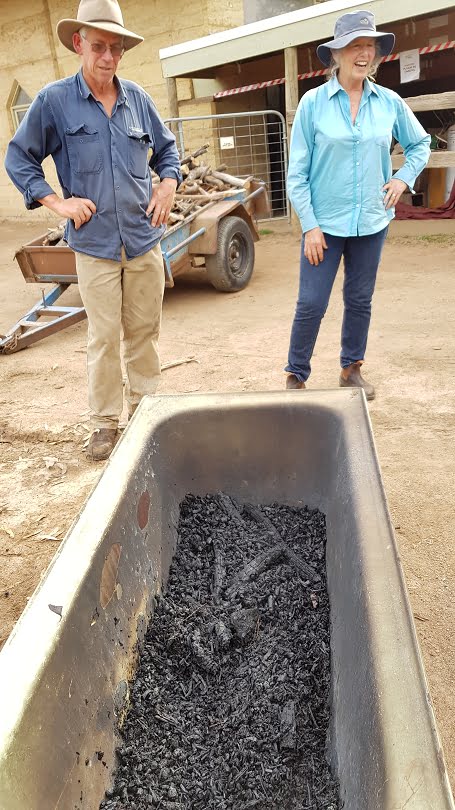
How to use biochar
How do you apply the finished product? We’ve covered this before in other blogs, but here are the methods that some people use:
- dig a trench, tip in a barrow load of biochar, add compost and a scattering of blood and bone;
- broadacre – spread with a fertiliser spreader and then go over it with harrows.
The point is to find some way to incorporate biochar into your soil where it will work its magic. And remember, it’s crucial to “charge” your biochar with microbes first to make it really effective.
Of course, it’s not magic, it’s science!
Biochar has remarkable effects on soil by providing both a stable form of soil carbon and an extensive habitat for soil microbes.
And the best bit? If you make it yourself, it’s completely free!
More biochar resources
Are you interested in learning more about biochar? Great idea! It’s an ancient method for creating super-productive and healthy soil that deserves our attention. If you’re serious about growing your own food, this technique can help you get there faster, no matter your soil type.
🔥 How to make biochar: two backyard methods
🔥 Can you use biochar with fruit trees?
🔥 Soil biology and the soil food web – understand the amazing world of soil microbes that are key to the Natural Fertility System.
🔥 The fundamentals of soil masterclass
Related Articles

Should you worry about bugs on fruit trees?
Should you be worried about the bugs on your fruit trees? Learn how to protect your fruit trees without upsetting nature.
Five ways to lead a more organic lifestyle
Five simple tips to help you live a more organic lifestyle and improve your health without breaking the bank.
Hands up – who loves Bramley apples?
Bramley apples are a magnificent cooking apple from England which deserve a place in many Australian gardens.

This does look easier but the tricky bit of not turning to ash is still daunting. Why not just collect coals from your fire… we have a kitchen slow combustion stove as well as a lounge room Ned Kelly heater. Both these produce quite a bit of coal over the winter months which I collect. Maybe not as good as the Biochar but I’m sure it would still have good qualities and I don’t have to do anything except collect it. Btw you can also use the ash to make laundry liquid! As well as use some (sparingly) on the garden. Win win!
Hi Dora – yes, excellent idea. Coal collected from the fire is still an awesome product to put in the garden, and you can pre-charge it to increase its effectiveness with worm juice or compost tea just the same as biochar (crushing it first might help with this as well). Interesting about using ash to make laundry liquid – do you have the recipe? (And do you mind sharing it?)
Interesting use of old bathtubs, they have many more uses as well! I make charcoal in the cheapest possible version of a “cone kiln”: a cone-shaped depression in the ground. You build a fire and keep adding wood until you have a strongly burning pile; you then let it burn until most of it is glowing red “coals”, then douse with water to put it out. It is imperative that you open up the mass and hose water into the middle to cool it down or it can spontaneously re-ignite and burn way to ash after you have walked away. Having the fire in a cone shaped hole reduces access of air to the bottom of the pile and thus you lose less of it to combustion than on flat ground, while the earth acts as a kind of insulator to keep the retained and radiant heat acting on the partly burnt wood down there, driving off the combustible volatiles. I also crush the finished charcoal by stomping on it over a coarse metal grill to reduce the size to less than 3cm, then grind it through an old electric mulcher to reduce most of it to less than 5mm. Having it still moist (not wet) when grinding it minimises black dust; if it is dusty that fine carbon can get into the electrics and short out your mulcher. The end product is similar to the expensive horticultural charcoal you can buy in Bunnings. Any residual ash in the charcoal will just add valuable minerals to the soil where you use the charcoal, and for preference rather than adding it directly to soil I include around 5% to 10% of the ground charcoal in hot compost to “charge” it with nutrients and microbes. The other minor ingredients I put in the hot compost are lignite (brown coal) and stone dust, both of which are also very cheap and long lasting in the soil. You do have to have enough land to be able to devote an area to burning wood, and a supply of wood, so not so practical for suburban backyards.
Hi Stuart, thanks for this – it’s fantastic to hear about other people’s systems for making biochar, and yours certainly sounds well thought out and tried and tested. We’ll have to give it a whirl. Thanks for sharing.
I crush my biochar by putting it in a woven plastic bag (e.g. empty 25K chook food bag) and driving backwards and forwards over it a few times till it is crushed to pretty small. Also, I think it is pretty alkaline and I have read that to prevent the soil getting too alkaline it is better to add no more than 5-10% by volume per year
Great tip Stephanie! Haven’t heard that about it being too alkaline, but will follow up.