Estimated reading time: 7 minutes
Grafting is a useful life skill that we recommend to any gardener who loves their fruit trees.
When you realise you can create a whole new tree from a single bud, it’s as close as you’ll come to magic in your garden!
There are many different techniques, some for summer and some for winter. Whichever method you decide to use, they’re all based on the same theory.
The basics of grafting fruit trees
Grafting takes wood from one fruit tree, of a known variety (called the scion, or grafting wood) and joins it to another fruit tree. The host tree might be a rootstock, or possibly an already grafted tree.
The different techniques provide different methods for creating a strong and permanent union.
Once you grasp the theory, you’ll understand that the actual grafting technique you use doesn’t really matter. It’s just a matter of suiting the right method for your situation. Each method better suits different tree types, rootstocks, branch sizes, times of the year, or varieties.
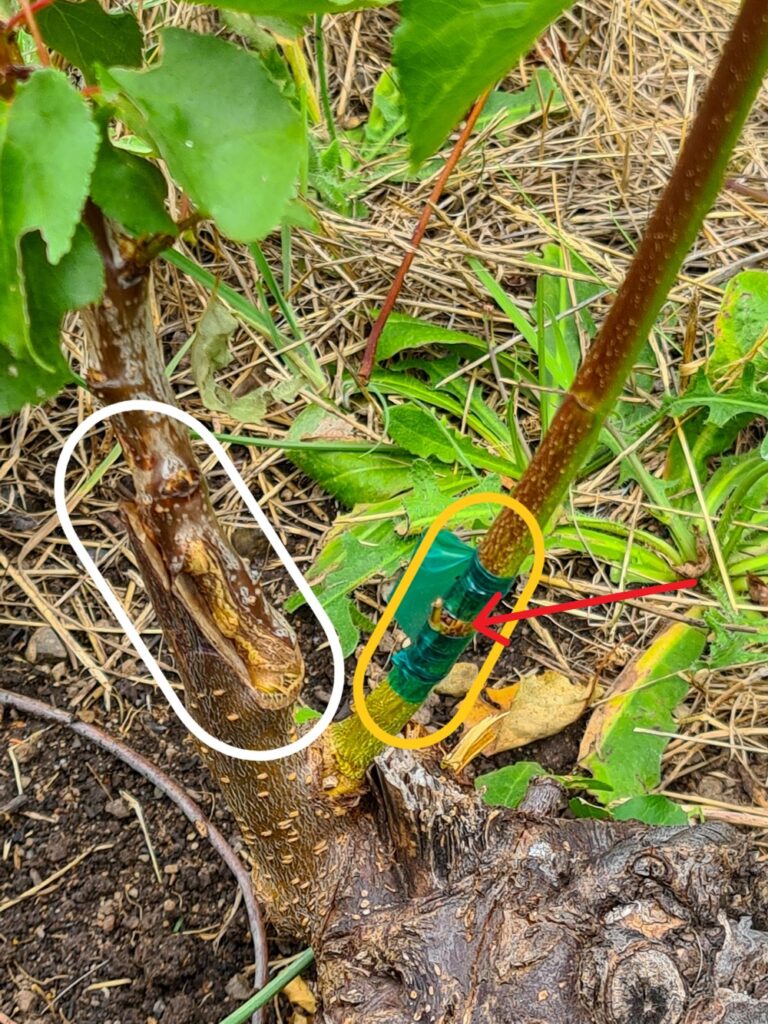
Can home gardeners learn how to graft?
Grafting is such a cool way to get functional fruit trees in your garden (for free) that we reckon all gardeners should learn it.
There are lots of different methods, but the main ones that we teach are:
That doesn’t mean other techniques are not useful or valuable. We just prefer to stick to teaching the proven techniques that we’ve been using for generations because they work!
What is grafting used for?
Grafting is useful when you want to change or add fruit types in your garden without changing trees. We adore this grafted tree that showcases 250 apple varieties.
It’s also the best way to preserve a heritage variety or add a polliniser to a tree that flowers well but doesn’t produce much fruit. Grafting is also a great way to turn a useless fruit tree (e.g. a cherry plum) into a useful tree (e.g. your favourite apricot variety).
Best of all, it’s a cheap and easy way to grow your own fruit tree from scratch so you never have to buy a tree from a nursery again!
Want to see a couple of practical ways to put it into action? Sometimes you have to “see it to do it”, so here are some practical examples.
Saving a broken tree
The “whip tongue” technique is one of the simplest methods of grafting. The next photo is a beautiful example of a healed graft. It clearly shows the whips and tongues on both scion and rootstock.
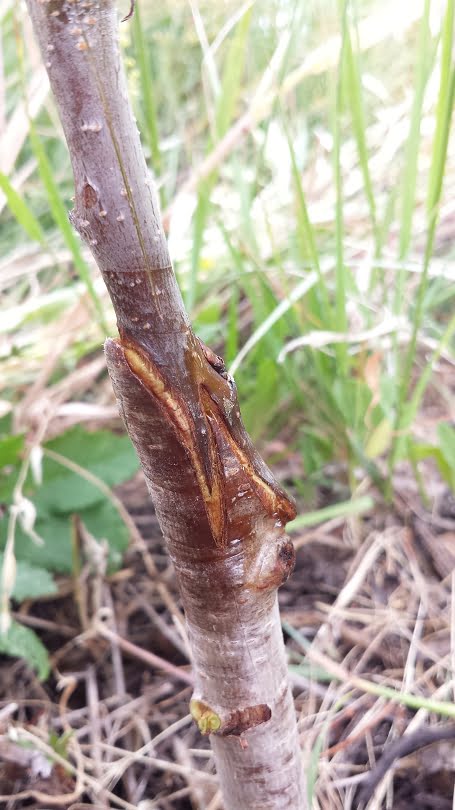
The photo (above) shows a Tilton apricot grafted onto a plum rootstock.
In fact, the tree was planted as an apricot tree in our orchard a couple of years ago. Then it had an accident (broken by a passing kangaroo!), so the top of the tree was broken off.
The rootstock (which was a plum) survived. Before long, it put out a new shoot that we were able to graft onto.
You can see there is good contact between the cambium layers of both the rootstock and the scion. The cambium layer is just under the bark. This layer is where the new tissue that binds the two pieces of wood together forever starts growing.
Making a new tree from scratch – for free
The photo below shows Katie’s dad teaching Katie and Sas how to do a technique called “root grafting” at the kitchen table.
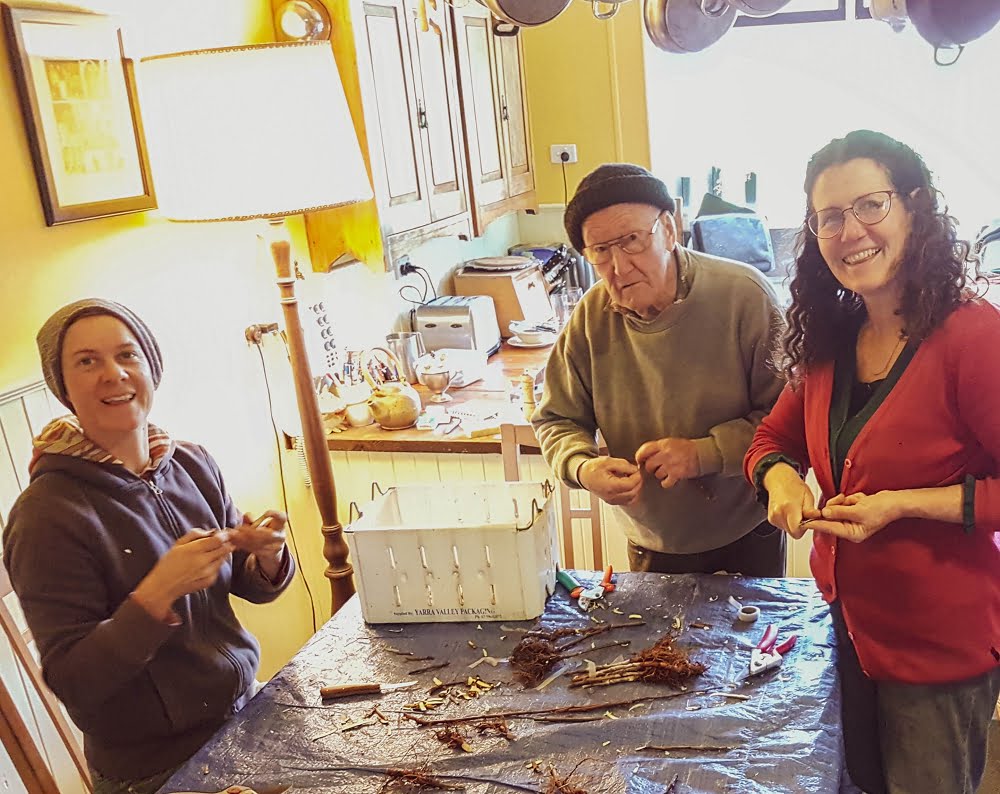
This is a type of whip-tongue grafting. It’s also a very cool way of growing new trees from a piece of root. In this example, the root piece is used as the rootstock. This is a fast way to create a new tree because you don’t have to grow the rootstock first.
Any time you’re planting a new fruit tree, just harvest a piece of the roots. Root pruning when you plant a tree is quite common anyway, you won’t be doing the tree any harm. (Just don’t remove too many roots).
We also recommend pruning the top of your tree when you plant it, and guess what? That’s a great source of scion wood.
All you have to do is graft your scion directly onto the root piece and ‘voila’ – a whole new tree. And it’s made out of waste materials that would otherwise go into the compost.
Changing varieties on a mature tree in your garden
Another way to save or repurpose a tree is to regraft the whole tree to a new variety. Here’s one we prepared earlier:
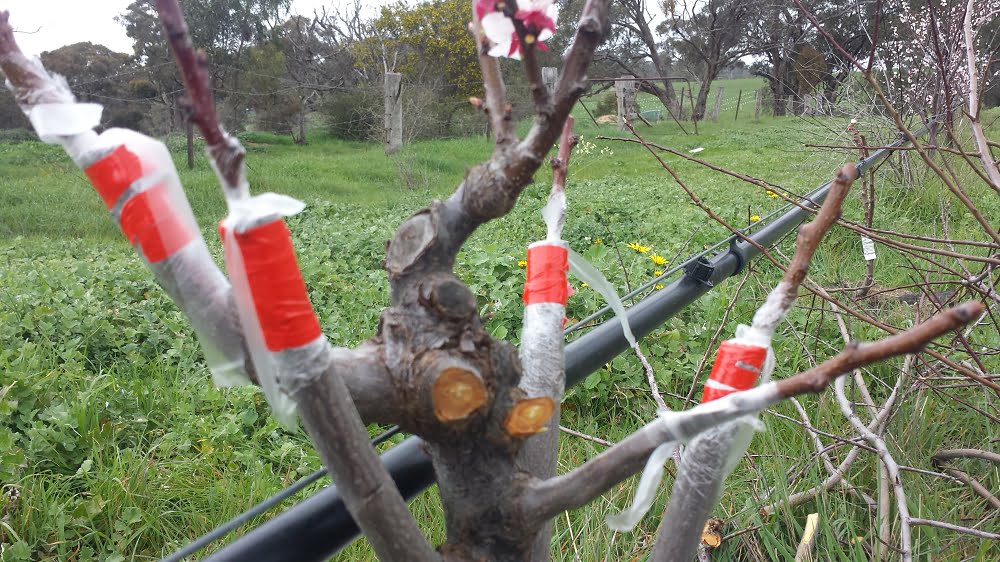
This is a great way of turning a useless tree (e.g. a variety you don’t like, or a tree that produces inedible or dull fruit, like a cherry plum) into a useful and productive tree that will add to your food security by growing fruit you want to eat.
You can supercharge the process by grafting a different variety onto each limb. This way you can grow 5, 6, or more varieties on the same tree. You’ll avoid the expense, bother or space issues of planting and looking after multiple trees!
When is the right time to graft?
Most grafting is done in late winter/early spring. Two conditions need to be met:
- you collected and stored some scion wood in advance, while the donor tree was dormant in winter;
- the tree you’re grafting onto has started to show some spring activity like growing flowers, leaves, or shoots.
The exception is budding, sometimes called summer budding. This (and chip budding) are both summer grafting techniques.
Summer budding is one of the easier methods because you don’t need to collect the scion wood in advance. Harvest the wood on the same day for the best results. This saves forward planning. However, depending on the situation, the tree may need some preparation in advance.
Preparation for grafting
If you’re planning to use budding on a mature tree, you’ll need to prune it hard a few months beforehand. This ensures that there are strong one-year-old shoots in the tree to bud onto.
Grafting can seem very complicated—until you do it. You’ll soon find that you can master the skills you need by getting comfortable with using a knife.
You may even have many failures along the way, but don’t let that put you off. Like any skill, it takes practise to get perfect. Start now to begin practicing as soon as possible!
Related Articles
A good grafting knife…
A good grafting knife (and knowing how to keep it sharp) sets you up for grafting success as much as the techniques you need to master.
Will subtropical fruit trees work in your garden?
A lot of subtropical fruit comes from indigenous forest cultures, but that doesn’t mean you can’t grow it in your backyard.
Animals, fruit trees, and electric fences
Animals and fruit trees go well together if you can figure out how to enjoy the benefits without the animals doing too much damage.


Great article… thankyou
Thanks so much for taking the time to let us know you enjoyed it Catherine – we appreciate it. Happy grafting!
our grafted dwarf red cleopatra ( planted bare root 2016) does not taste like it’s description- beautiful apples but bland and not crisp. we would like to graft it with apples we have that we like ( cox or andre sauvage ) – do we need to do this to the root stock or can we graft to the branch ( i espaliered it) . will be my 1st grafting
Hi Sharon, you can graft it straight to the branch. Then the Cleopatra is acting as what we call an “interstock”. The technique you choose will depend on the diameter of the wood you’re grafting onto – we have short courses on each of the techniques available here: https://growgreatfruit.com/product-category/grafting/. Good luck with the grafting – it’s an exciting world to enter, you’ll never look back!
Thank you for all the valuable information. I love reading and learning from your posts.
Absolutely fabulous course. But if you want new varieties, where do you buy the new variety graft from?
Before buying, we’d probably start with a local gardening group/facebook group to ask around – you never know what you might find!
Then, there are quite a few suppliers across Australia – you can buy from Daleys, and we’ve sourced some of our heritage varieties from places like Werribee Park Mansion heritage gardens and The lost seed. Good luck! Meg – Grow Great Fruit team.
I am located Northern NSW
I have a red apple tree, unknown variety I has not produced fruit of a quantity to eat, our hot summers affect it
We have a nashi, planted around the same time at least 20 years old
Would I be able to graft some of the Nashi on to the red apple?
We love the nashi, so do the coddling moth…but we are winning
Hi Kathy,
Grafting is most successful when the root stock & scion wood are of the same genus. In this case, apples genus is ‘Malus’ and nashi pears genus is ‘Pyrus’. So, unlikely to be successful. But, if you are keen to try your hand at grafting, why not find some suitable rootstock and have a go with your nashi. A good rootstock for a nashi would be common pear (Pyrus domestica) or dwarfing quince stock.
Good luck with the coddling moth too. Meg, GGF team.
Where can I find on-line advice on grafting figs? I have a massive well established fig tree adjacent my veranda. The figs are inedible. I have a small very sweet tasting fig tree elsewhere and have been trying to graft the sweet onto the large. No success after 25 attempts.
Hi Clive, figs are usually grafted using all the same techniques as grafting other fruit trees – you can find detailed instructions for each type here: https://growgreatfruit.com/product-category/grafting/. However, it can be hard to get a small graft to take on a mature tree because the graft is only getting a small amount of energy compared to the rest of the tree. The more of the original tree you remove to do the grafting, the higher the chance of success. You don’t have much to lose by doing that even if the grafts don’t take because the original tree is no good. Grafts grow really easily from cuttings, so you could just remove the original tree and take cuttings of your good tree to grow a replacement.
In my wanderings around the backwoods of new england, I have very often run across what I call wild crabapple trees. Small, with reddish bark, perfect horizontal branching, has anyone tried this stock for root grafting? I am going to give this a try.